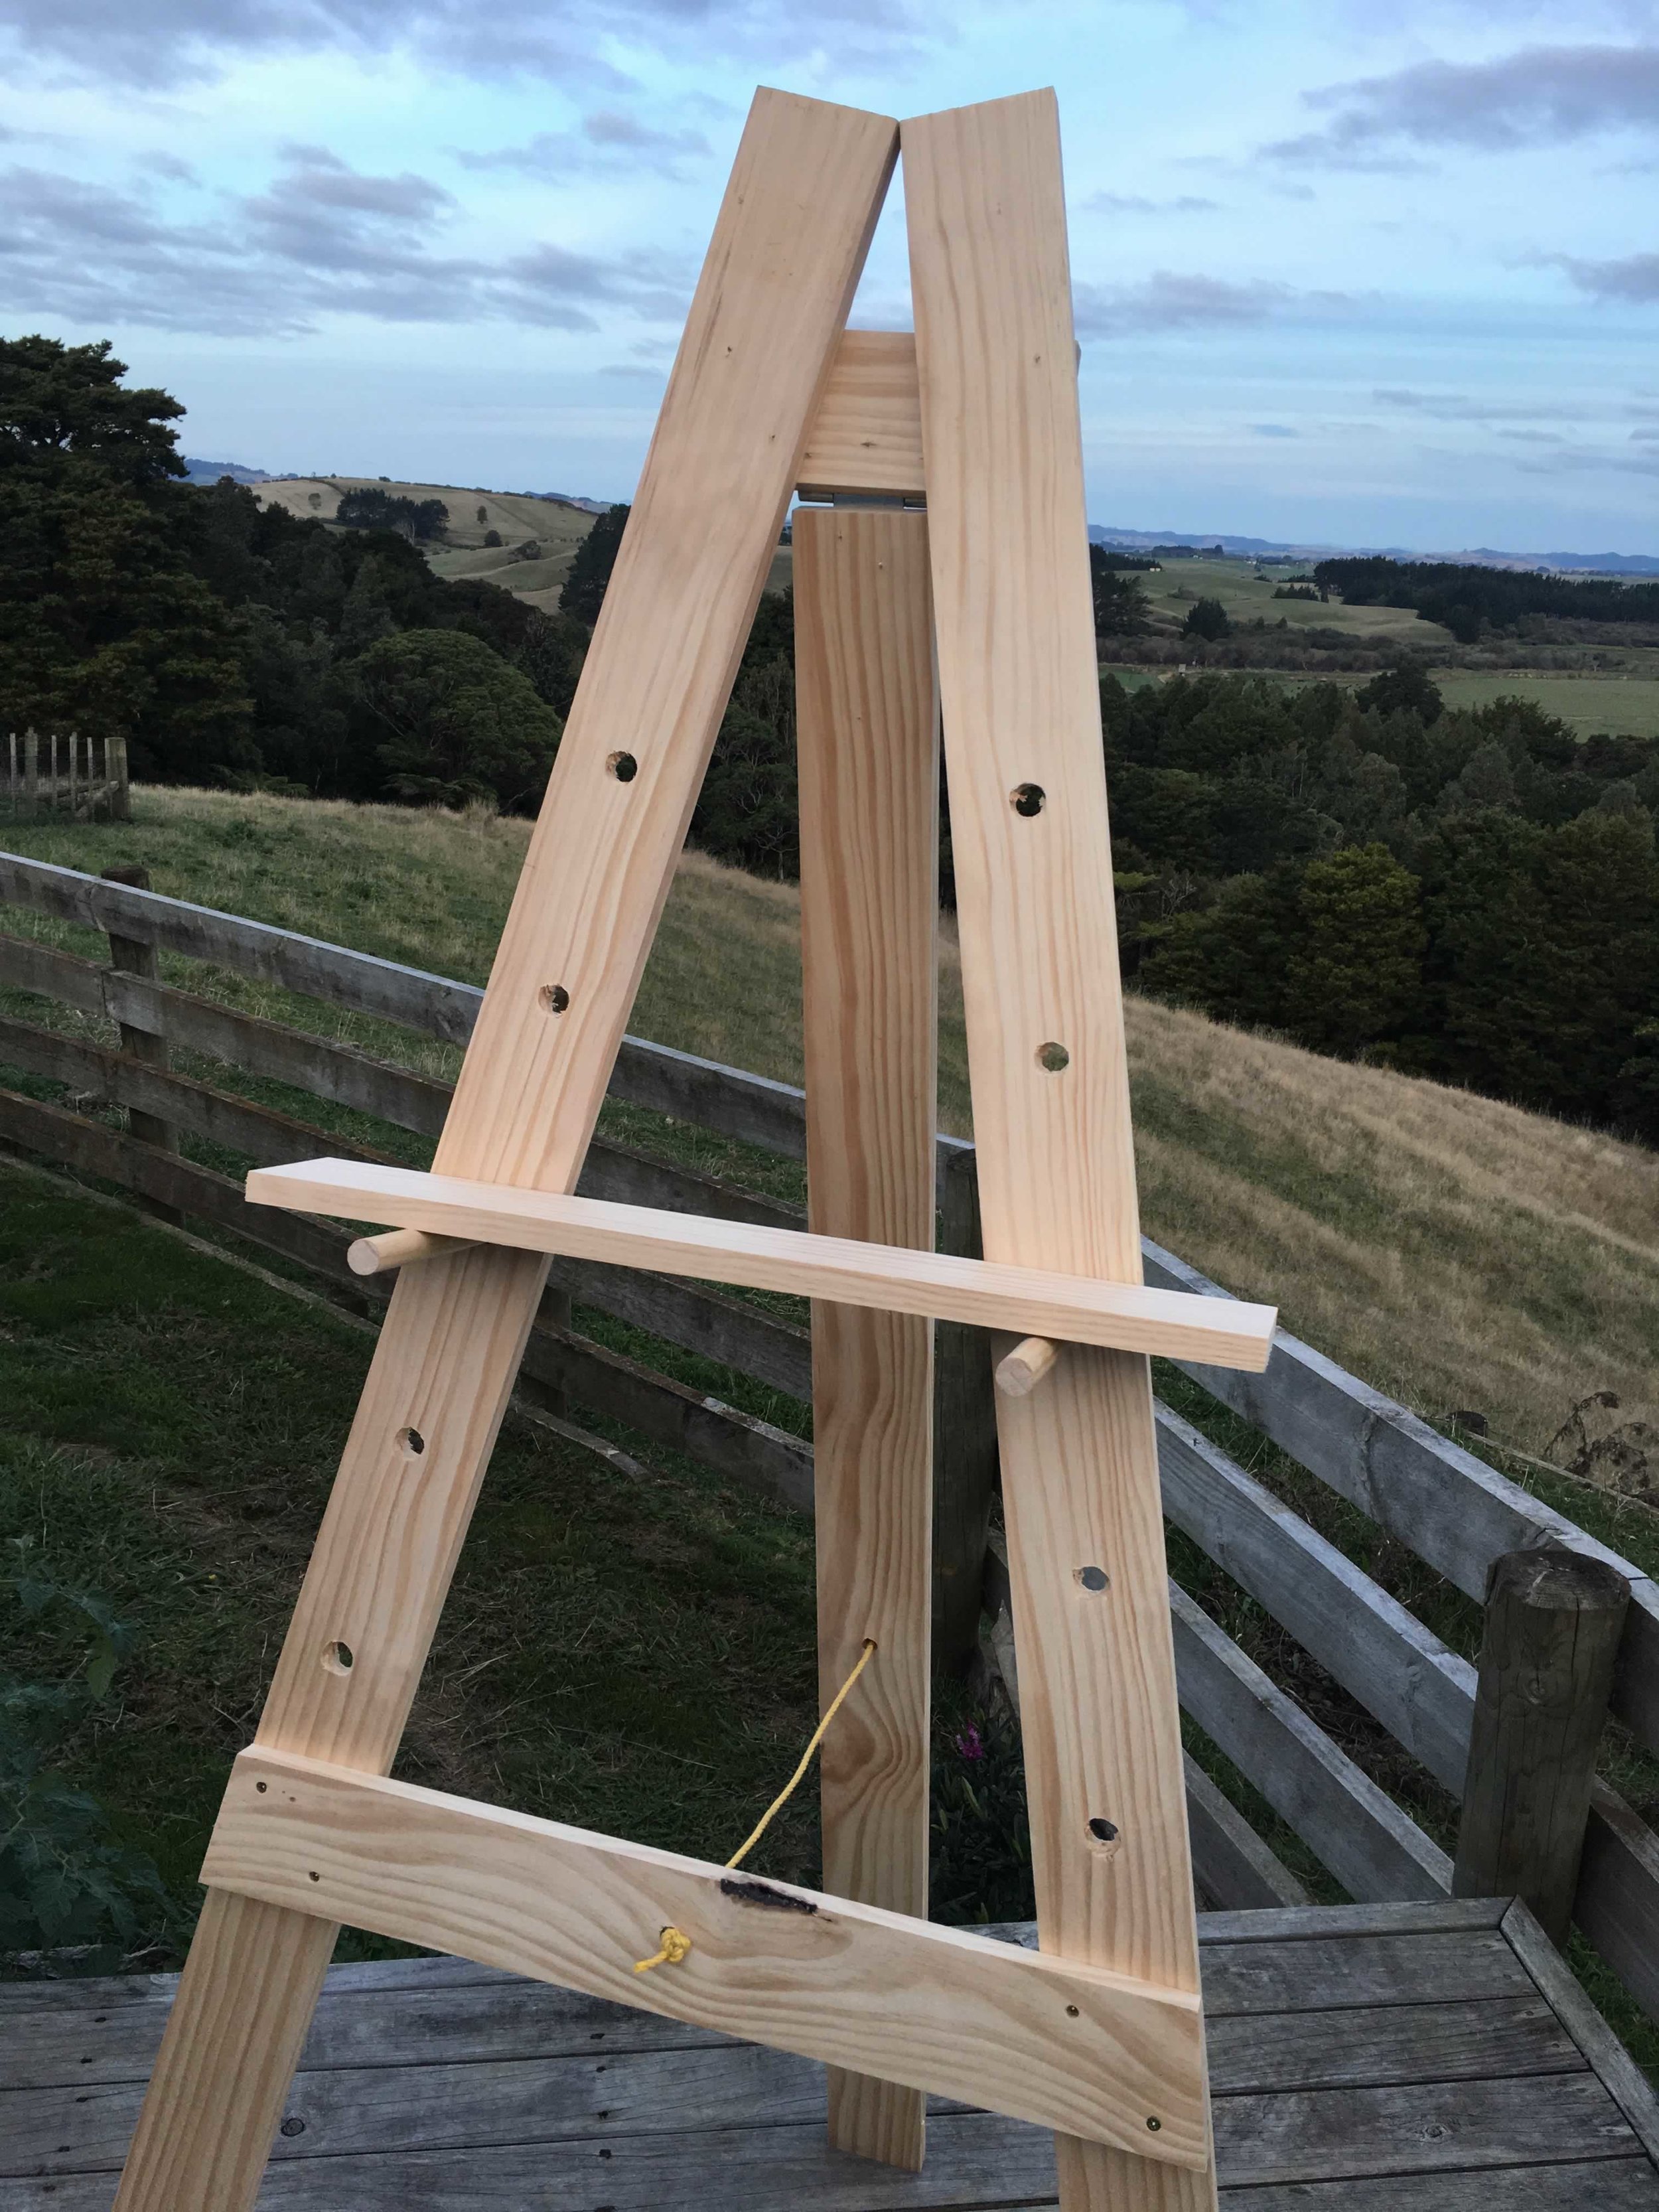
This is an easy and relatively affordable way of building a painter's easel yourself. Or coercing your partner to help, as in my case. You can also watch the YouTube video at the bottom of the post that I used for directions and visual reference. I live in New Zealand, and I had to buy the timber, dowel and a hinge two-pack so the project ended up costing me around $50. If you have everything in order assembly shouldn't take too long.
You will need:
3 x 2.4m x 70mm x20mm timber (I used cheap pine)
.5m piece of thick rope
25mm long hex heads screws
1 x Hinge
20mm Dowel
Drill
Drill bits (one standard and one to make a hole slightly smaller than 20mm.)
Tape measure
Pencil and eraser
Leveler for accuracy
Hand saw or table saw
Measure your wood and use your saw to cut out the sizes below. I cut the three leg pieces at a slight angle so that when standing upright, the legs lay flat on the ground.
2 front legs 1.8m
1 back leg 1.5m
1 cross brace 670mm
1 top brace 230mm
keep the longest off cut beam for a cross member to put on top of the dowels so you can have a ledge to put your canvas on.
Lay your two 1.8m front legs in an A shape and drill the 670mm cross brace to the legs just high enough from the bottom so that it doesn't poke out on the sides.
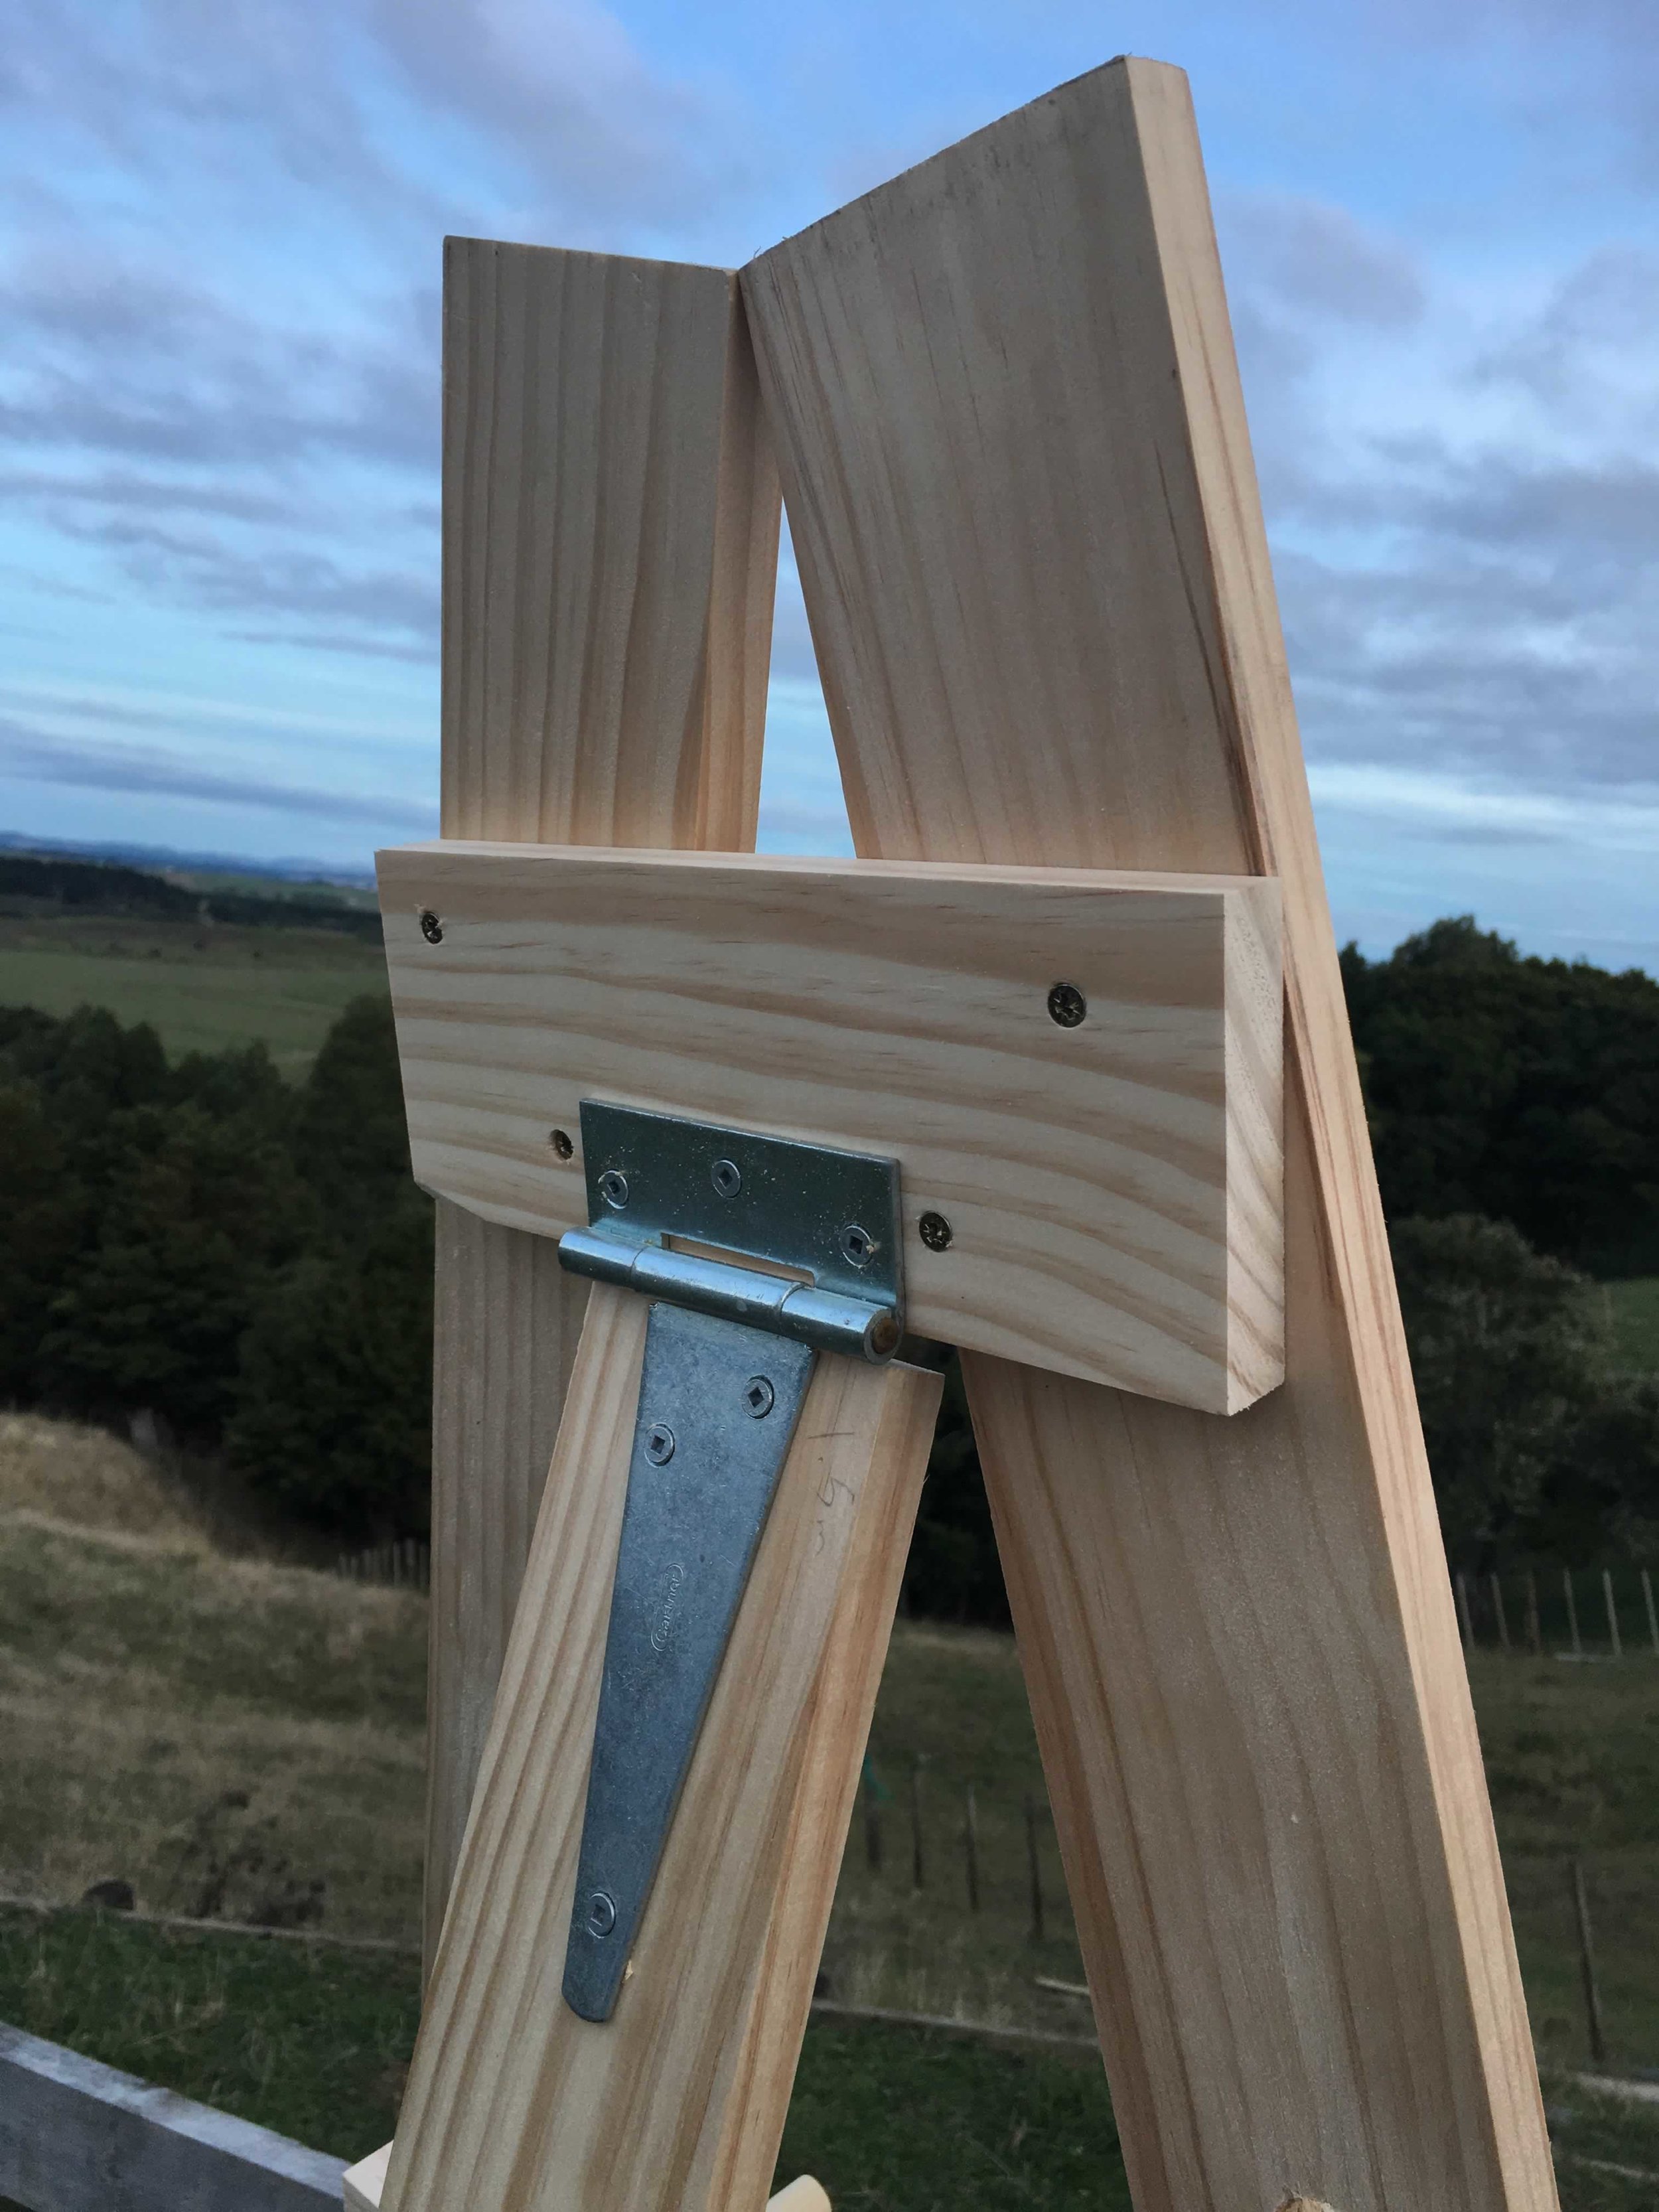
Turn the easel over and screw in the 230mm top brace on the top of the A shaped legs.
Take your hinge and screw the base to the top brace with the hinge facing down. Take the 1.5m back leg, put it under the brace in the middle of the A shaped legs and screw the hinge on.
Stand up the easel. It is time to mark your dowel holes. Using the bottom cross brace as the starting point, I measured 150mm up one side of the easel between dowel holes with pencil and marked 5 holes. I then used the leveler to mark the other side so that the holes are level. The holes for the dowels should be slightly smaller than the dowels themselves so that they fit snugly. When drilling the dowel holes, I first used a pilot screw and then the larger drill bit so that the wood doesn't splinter. You will need to taper the dowels in order for them to fit. I only had a 15mm drill bit instead of 18mm so I used an electric sander to taper my dowels down quiet a bit. I then used the sander to smooth out any splinters in the holes as the drill bit was a little dull.
Lastly, mark the center of your lower cross beam. Fold in the back leg so it's flush with the cross beam, and drill a hole through both pieces of wood at the same time. Thread your piece of rope through, move your back leg to your desired distance, and tie it of at the two ends. This way your back leg won't slide out.
Put in your dowels, lay your cross beam on top of them and you are done!


